2. The second item on the list is called Connect to the Internet. Clicking on it actually starts the Configure E-Mail and Internet Connection Wizard; or as we call it, the CEICW. It used to be called the ICW in SBS2000, but someone must have decided that was too easy to remember. :>) There are quite a few screens to this wizard and depending on your choices you will see different ones. I will show you the two most frequently used choices: SMTP Mail and Pop Mail. Keep in mind, even if you use "pop" for your incoming mail, you still need SMTP for your outgoing mail. Of course, you can use SMTP for your incoming mail and also have Pop incoming mail as well. Let's start the CEICW.

Please note most of the windows that follow have a More Information button. If you are un-sure what is required on the window, click it for more details of what is needed.
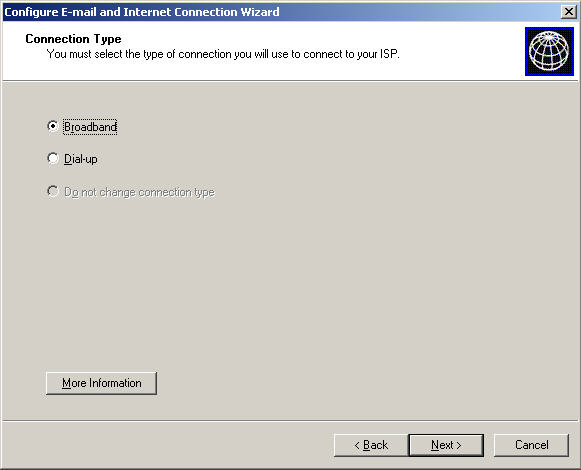
Next you need to specify your connection speed as either Broadband or Dial-up (modem). Note the choice for Do Not Change. This is very handy for subsequent runs of the CEICW when you only need to make changes to another section.
So if you have a cable modem or DSL connection the correct choice is A direct broadband connection. This will enable the time service. It is important for the time service to be running as differences of more than 5 minutes across the domain can cause communication problems. You should, of course, pick the correct option for your circumstances.
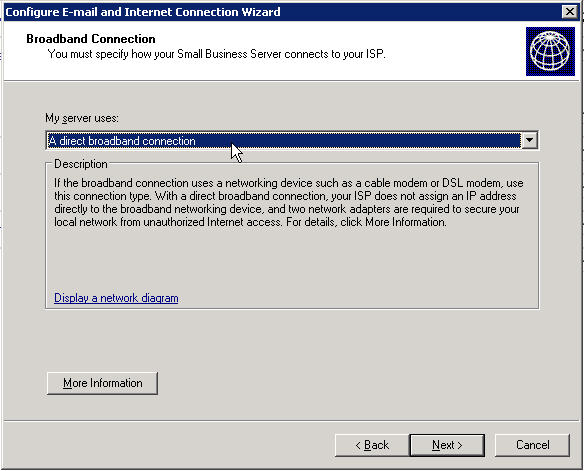
If you find yourself confused, click the Display a Network diagram link and the following picture is displayed.
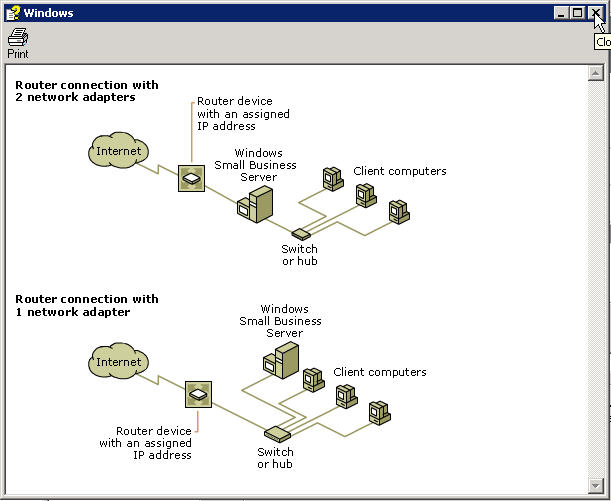
.
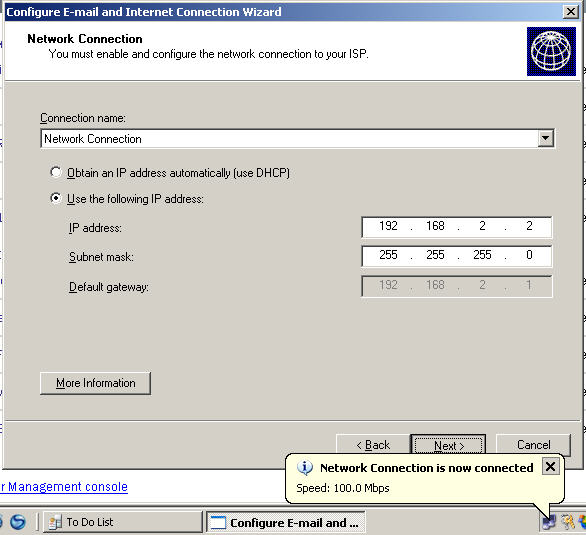
You should see the little popup telling you the network connection is now working.
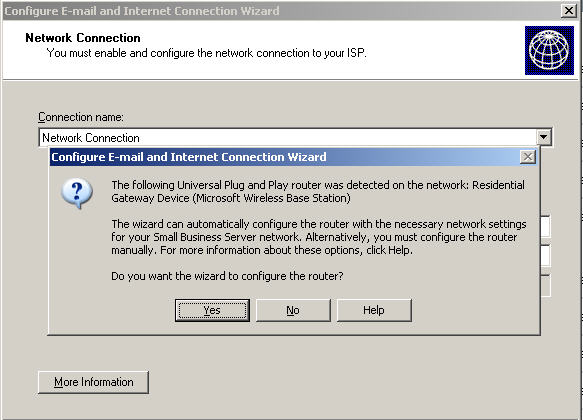
If you have a UPNP Router, the CEICW will offer to configure it for you. It is OK to let it do its thing, but, go back and check what it did. Sometimes it opens unnecessary ports. If you find that to be the case, clear those open ports that you are not actually using.
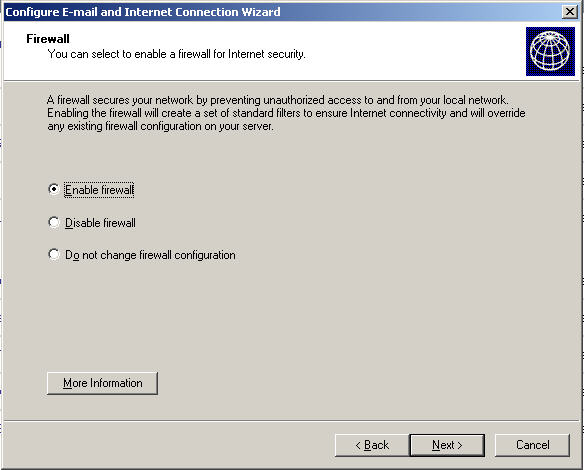
Next, we want to enable our internal firewall. If you are re-running the CEICW and have already setup a firewall and don't want it changed, check the Do not change firewall configuration box. For our example we will use Enable firewall
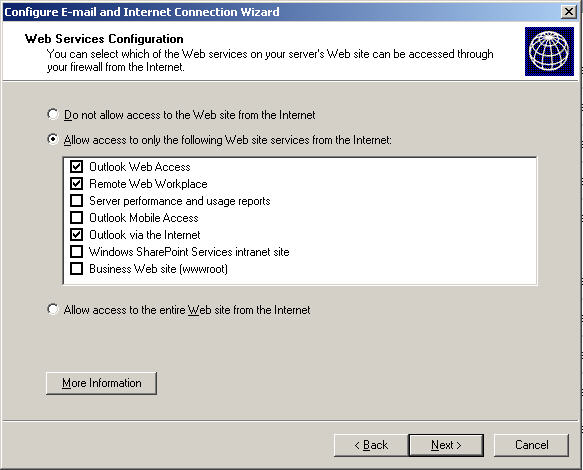
Only check the services you will actually be using. Most installations will only need to check E-mail on this screen.
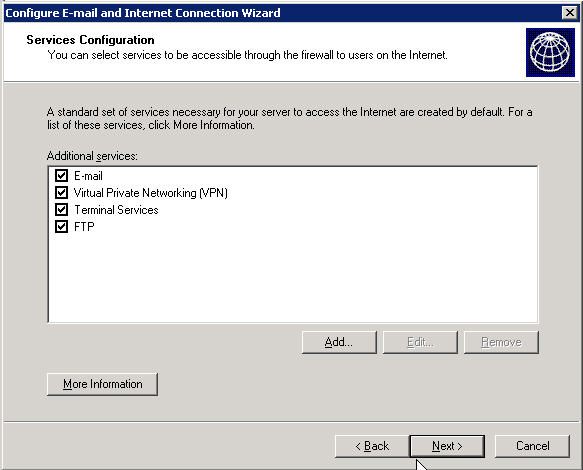
Same thing goes for this screen -- only check the services you know you will be using. You can always add another service at a later time by re-running the CEICW. In the example below, I have checked the most common services that most people will use.
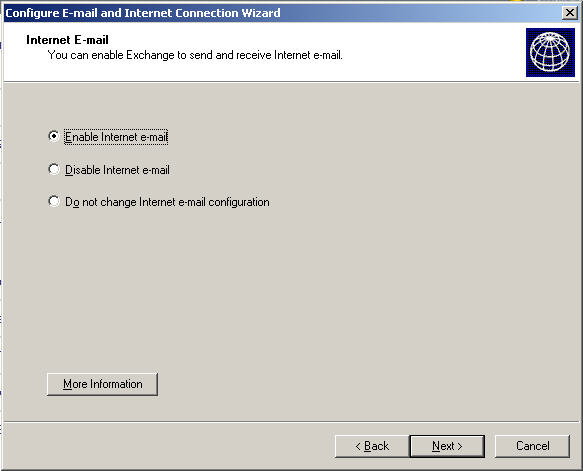
Unless you are that one person in a million, you will want to check Enable Internet Mail here.
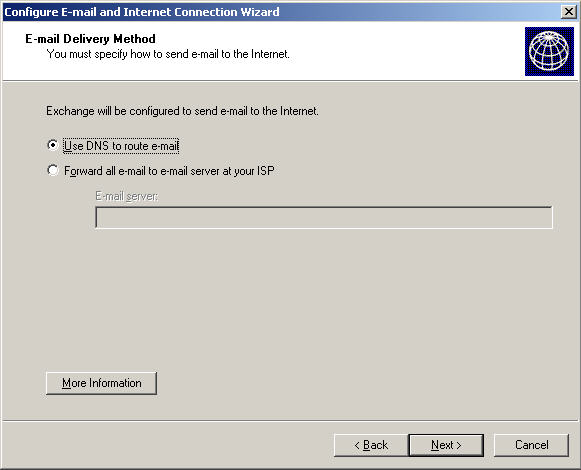
If your ISP allows it I recommend using DNS to route your mail. It is the least troublesome for outgoing mail. If your ISP does not allow this you will have to Forward though his server.
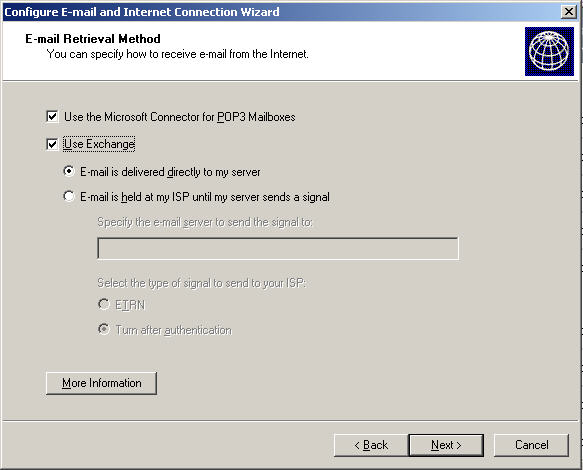
As I mentioned at the beginning of this section, there are many ways to get your mail. The best way is to have it come directly to your server. This requires your ISP to create an MX record for your server in the public DNS namespace. The second choice would be to have your mail go to the ISP mail server, and then you retrieve it. If this is what your ISP requires, they will give you the needed command to retrieve the mail from their server. Or as the third, least desirable option, you can use Pop3 Mail; either a Global Pop Box or Individual Pop Boxes. You can even use a combination of both types of pop boxes or one of the SMTP connections (Use Exchange) and Pop3 Mail.
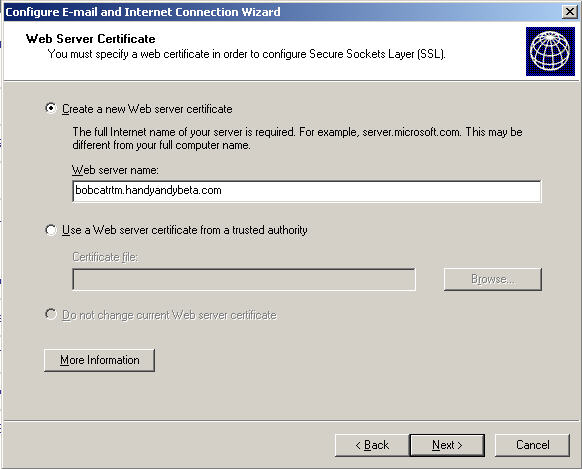
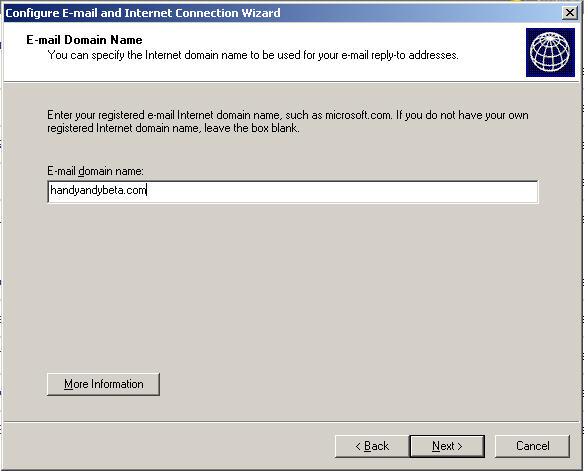
In the next window, you want to identify your public domain name for receiving mail. This is not "company.loc", but rather "company.com", or whatever you have as your public domain. This will be the default return domain name for all your users' outgoing mail.
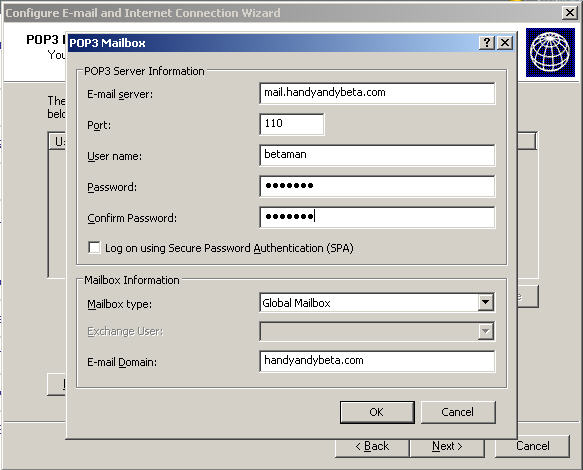
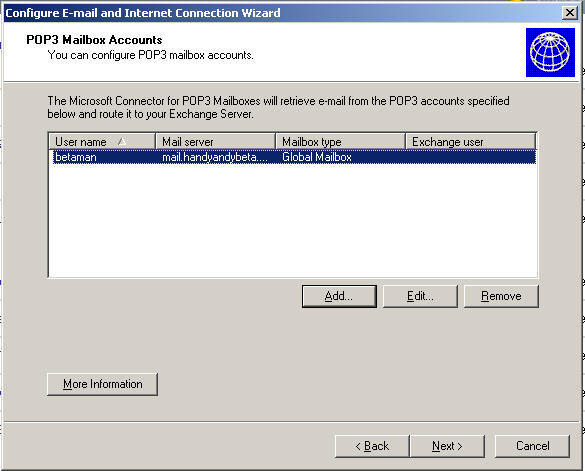
If you checked Pop3 two steps back, you will get the following window. Click Add to input your Pop3 mail information.
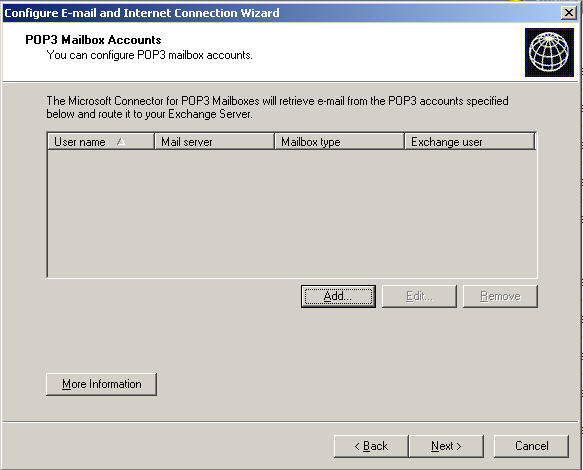
Keep in mind that although you can have as many of these as you want, Pop3 mail is looked at as a temporary solution until you can get real mail service.
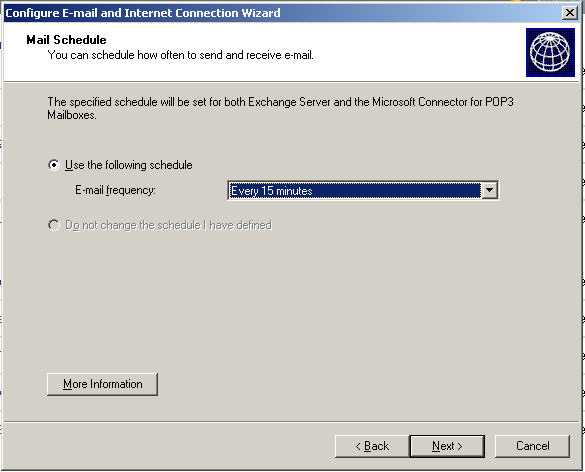
If you picked Pop3, or one of the Exchange choices that requires sending a signal to retrieve the mail, you will be presented with the next box. This is where you schedule how often Exchange looks for new mail. You cannot set it for a frequency less than 15 minutes. This is to make sure the previous cycle finishes before a new one starts. Many installers want it more frequent, but the choice is not available.
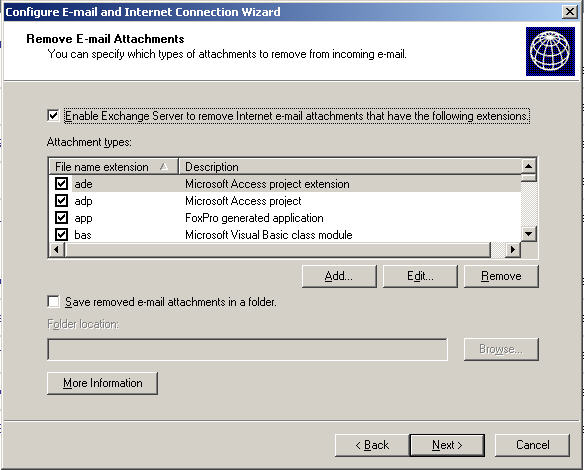
It comes with a default list of "dangerous" file types. You can modify the list to your liking.
In light of recent events, you might seriously consider adding "zip" files to the list.
You will now be presented with a summary of your choices. Other than enabling the NIC, nothing has been changed yet. I have broken the summary into three screens so you can read the entire summary.
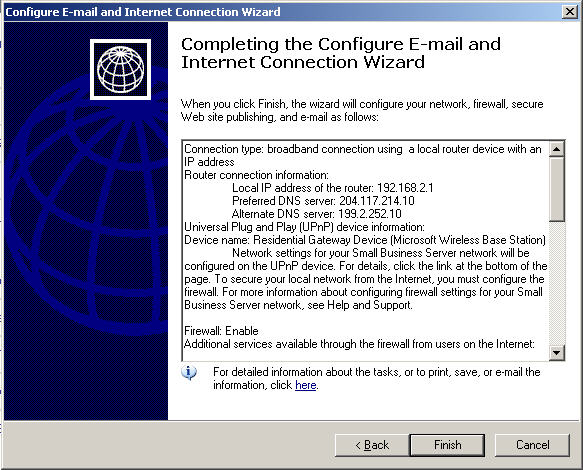
Keep reading
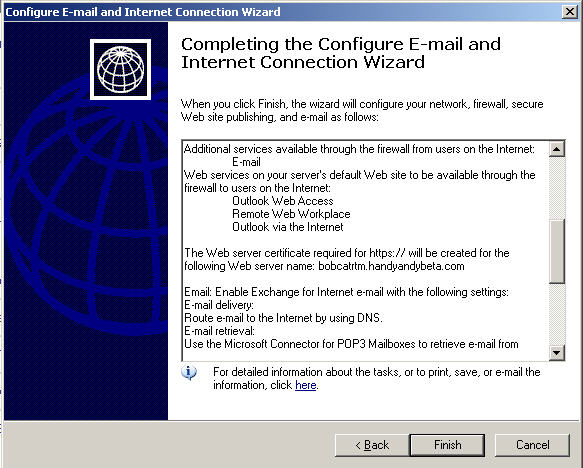
A little farther.
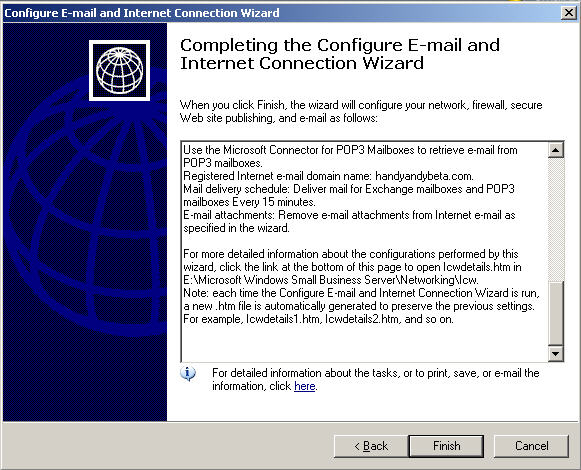
When you hit Finish, the changes will actually be applied.
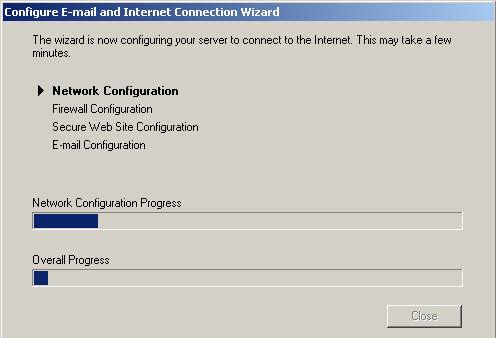
And you should see this

When you hit Close, you would
think it is done. However, there is one more little issue ---
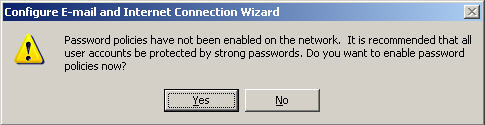
The best defense you have against people getting into your system is to enable these strong password policies.
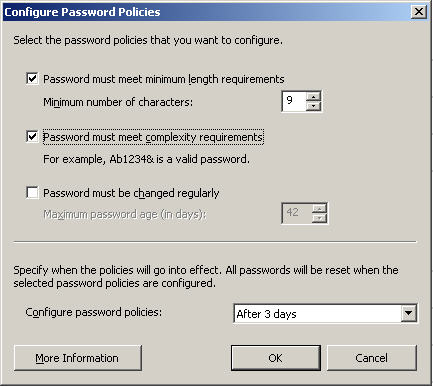
You can decide how strong to make them and how often they need to be changed. Also, note the last selection combo-box -- this is very handy while setting up the network. It will let you delay the policy taking effect. This allows you to define an easy password for the setup process, and then when you turn over the network to the users, it will prompt them to change their password, after which the policy will be in effect.
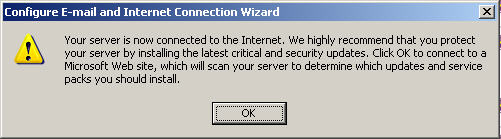
OK, even if you plan on using SUS and automating your patching, do this NOW and get the server up-to-date.